Guide
Apr 20, 2023
Generating and Using UUIDs in React
Kumar Harsh
Learn the significance of UUIDs in full-stack apps, their optimal usage, and how to implement them in React apps.
When working with full-stack apps, you will often come across identifiers. Also known as IDs, identifiers are used to identify data records related to apps. Based on the sensitivity and scope of the data in question, the identifier can be set as locally or globally unique. A popular globally unique identifier is UUID, which stands for universally unique identifier.
In this article, you will learn what UUIDs are, when to use them, and how to get started with implementing them in your React app.
What Are UUIDs and When Are They Used?
UUIDs are a popular and safe method of generating globally unique identifiers for data records. It's said that there's a one-in-a-billion chance of two randomly generated UUIDs matching exactly in a set of 103 trillion UUIDs, which is small enough to say that UUIDs are practically unique.
UUIDs are also better than sequential identifiers when it comes to parallel data insertion in databases as you don't need to adhere to a sequence to create keys and insert records.
A UUID is formatted like this: 2a6db6e1-8967-4511-9839-a7cb3c895710.
There are a total of thirty-two hexadecimal characters separated into sets of 8-4-4-4-12 characters, which are themselves separated by hyphens. However, these thirty-two characters cannot be randomly generated and put together to create a UUID. In order for an ID to be universally unique—and therefore be called a UUID—it needs to be compliant with the RFC 4122 protocol.
UUIDs have multiple use cases, the most prominent of which include the following:
- To identify records uniquely across tables
- When two tables are merged, as UUIDs remain unique to avoid confusion
- When parallel insertion is needed, as sequential IDs can be created in parallel
A number of third-party libraries and functions are available to make it simpler for developers to implement UUIDs in apps. In the following section, you'll see multiple ways to implement UUIDs in a React app.
Generating UUIDs in Your React Application
Now that you understand what UUIDs are (and when you might use them), let's move on to how you can implement them in your React apps. First, you will create a boilerplate form, then learn how to set up a UUID on that form in four different ways.
Each of these methods will use the same protocol to generate UUIDs that are globally unique. Which one you use, however, will depend on your use case and preferences.
The first two will require external dependencies that may make developer experience better but add a performance overhead and/or weight to the app size. The third method will use an inbuilt function from the crypto package (which may or may not be available depending on the JavaScript environment), and the last method will use a raw algorithm to create UUIDs manually in app, adding no weight or performance overhead to your app but requiring manual setup and maintenance.
You can find the complete source code of the demo app in this GitHub repo.
Prerequisites
To proceed with this tutorial, you need to have npm installed on your system.
Next, you'll need to set up a new React project. Run the following command:
npx create-react-app react-uuid-demo
Once the new React project is created, run the following commands to start the development server:
cd react-uuid-demonpm start
This is what the output should look like.

You will install the dependencies as required later on.
Create a Simple Page with User Information
To ease your familiarity with the concepts, you'll create a basic boilerplate form that asks for a username and email and allows users to generate a UUID for themselves. Here's what the form will look like.
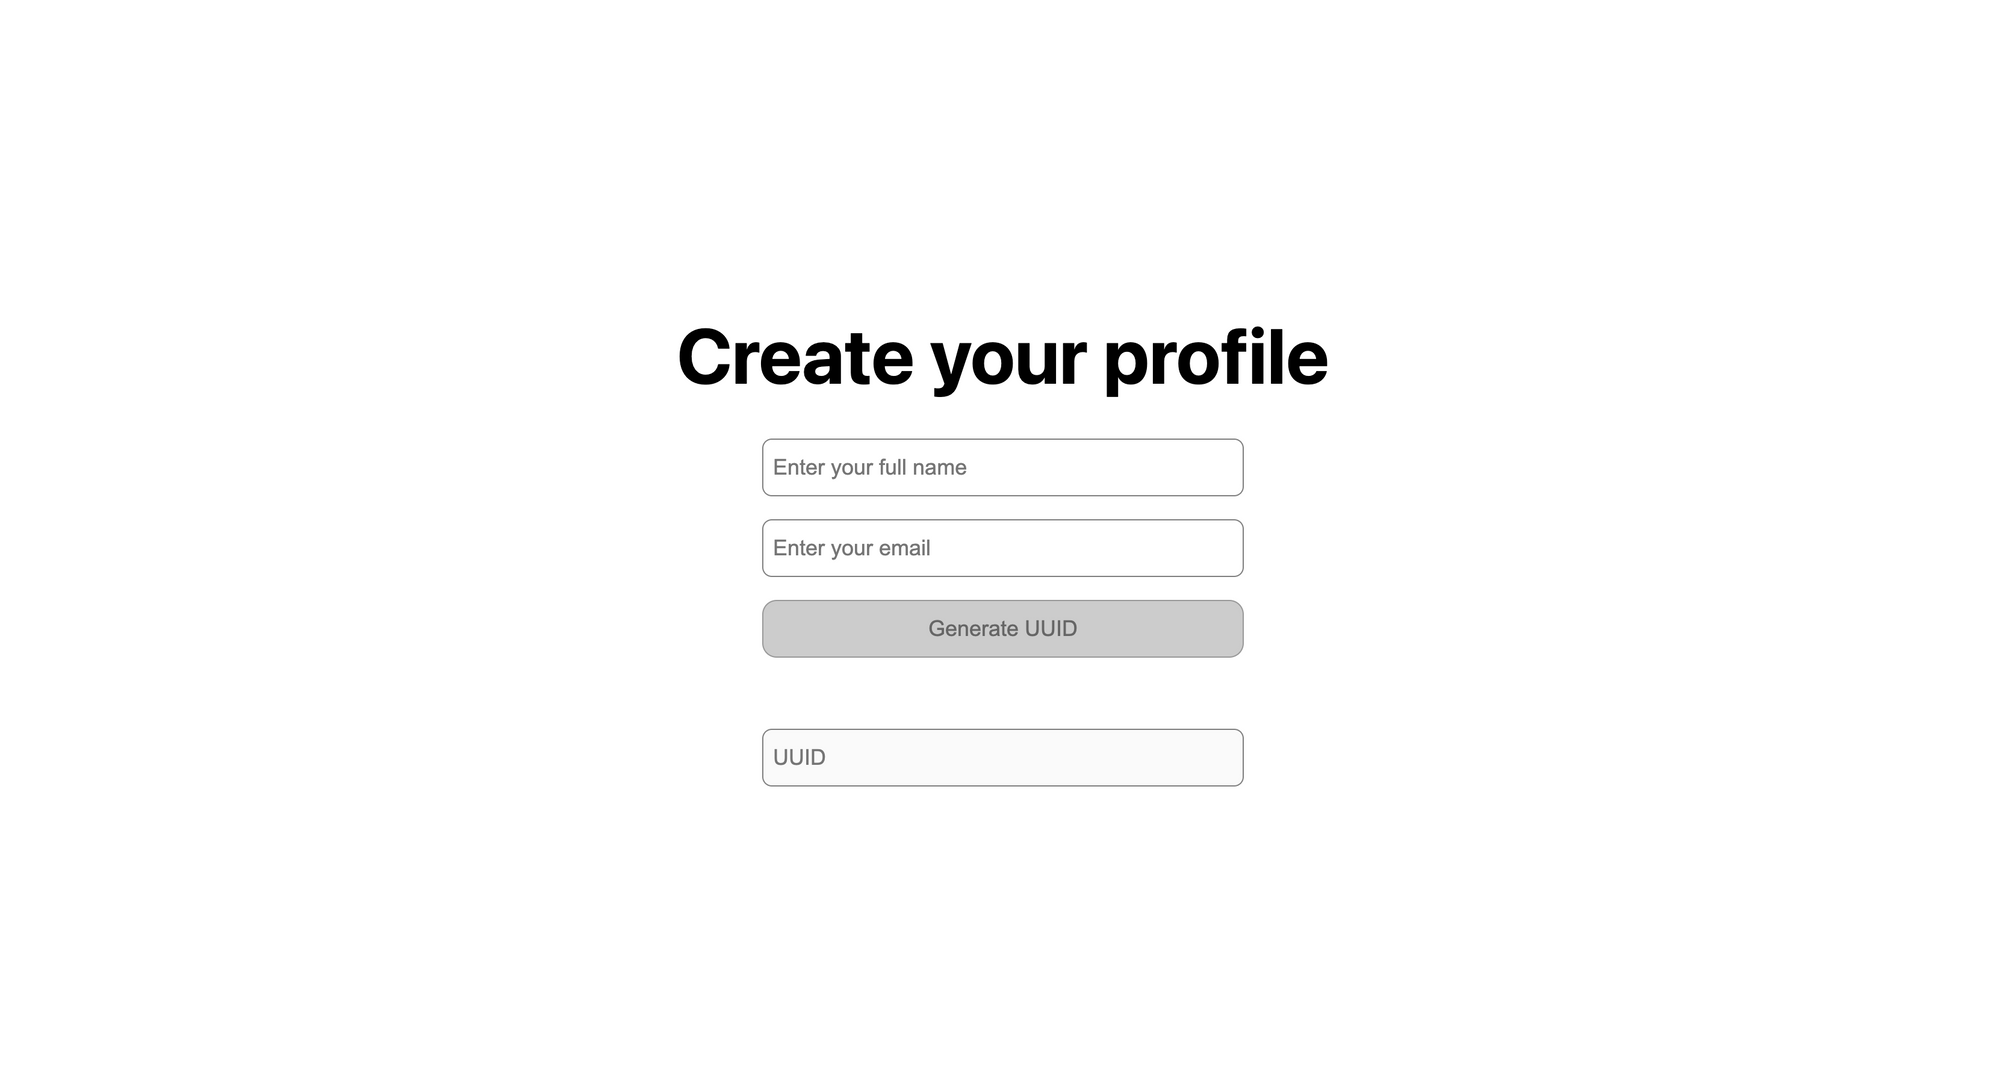
The Generate UUID button will be enabled once the user fills in the form data.
To set it up, you'll need to paste the following code snippet into your App.js file:
import './App.css';import { useState } from 'react'export default function App() {// define state containersconst [name, setName] = useState("")const [email, setEmail] = useState("")const [id, setId] = useState("")// Define listener for button click event. You will use this function to generate UUIDs laterconst onGenerateButtonClick = () => {console.log("Button clicked")}return (<div className={"mainContainer"}><div className={"titleContainer"}><div>Create your profile</div></div>{/* Name input field */}<div className={"inputContainer"}><inputvalue={name}placeholder="Enter your full name"onChange={ev => setName(ev.target.value)}className={"inputBox"} /><br /></div>{/* Email input field */}<div className={"inputContainer"}><inputvalue={email}placeholder="Enter your email"onChange={ev => setEmail(ev.target.value)}className={"inputBox"} /><br /></div>{/* Button to generate UUIDs */}<div className={"buttonContainer"}><inputtype={"button"}disabled={!(name !== "" && email !== "")}value={"Generate UUID"}onClick={onGenerateButtonClick}className={"inputBox"} /><br /></div>{/* UUID box */}<div className={"inputContainer"}><inputvalue={id}placeholder="UUID"disabled={true}onChange={ev => setId(ev.target.value)}className={"inputBox"} /><br /></div></div>)}
To add some basic styling so that the form looks like the one shown in the image above, you'll need to paste the following code snippet into your App.css file:
.mainContainer {flex-direction: column;display: flex;align-items: center;justify-content: center;height: 100vh;}.titleContainer {display: flex;flex-direction: column;font-size: 64px;margin-bottom: 32px;font-weight: bolder;align-items: center;justify-content: center;}.inputContainer {display: flex;flex-direction: column;align-items: center;justify-content: center;}.buttonContainer {display: flex;flex-direction: column;align-items: center;justify-content: center;margin-bottom: 40px;}.inputBox {height: 48px;width: 400px;font-size: large;border-radius: 8px;border: 1px solid grey;padding-left: 8px;}
You'll also need to update the styles in index.css with the following code to complete the styling of the app:
html,body {padding: 0;margin: 0;font-family: -apple-system, BlinkMacSystemFont, Segoe UI, Roboto, Oxygen, Ubuntu, Cantarell,Fira Sans, Droid Sans, Helvetica Neue, sans-serif;}* {box-sizing: border-box;}main {padding: 5rem 0;flex: 1;display: flex;flex-direction: column;justify-content: center;align-items: center;}code {background: #fafafa;border-radius: 5px;padding: 0.75rem;font-family: Menlo, Monaco, Lucida Console, Courier New, monospace;}input[type="button"] {border: none;background: cornflowerblue;color: white;padding: 4px 12px;border-radius: 12px;cursor: pointer;}input[type="button"]:disabled,input[type="button"][disabled]{border: 1px solid #999999;background-color: #cccccc;color: #666666;}
If you run the app now, it should look like the one in the image shared above.
Create UUIDs Using Different Methods
Now that your base app is ready, you'll see how to create UUIDs using uuidv4, react-uuid, crypto.randomUUID(), and finally, through code.
Using uuidv4
The first and quite popular method of generating UUIDs in JavaScript-based apps is with the uuid npm package. You can install it in your React app by running the following command:
npm i uuid
You'll need to import it into your app by adding the following line of code below the existing imports in your App.js file:
import { v4 as uuid } from 'uuid';
You can now use the following function to generate UUIDs using this package:
const uuidFromUuidV4 = () => {const newUuid = uuid()setId(newUuid)}
Note: You'll need to paste this function in your App component right below the onGenerateButtonClick() function.
Finally, you'll need to replace the onGenerateButtonClick function in your App component with the code below to call this method when the Generate UUID button is clicked:
const onGenerateButtonClick = () => {uuidFromUuidV4()}
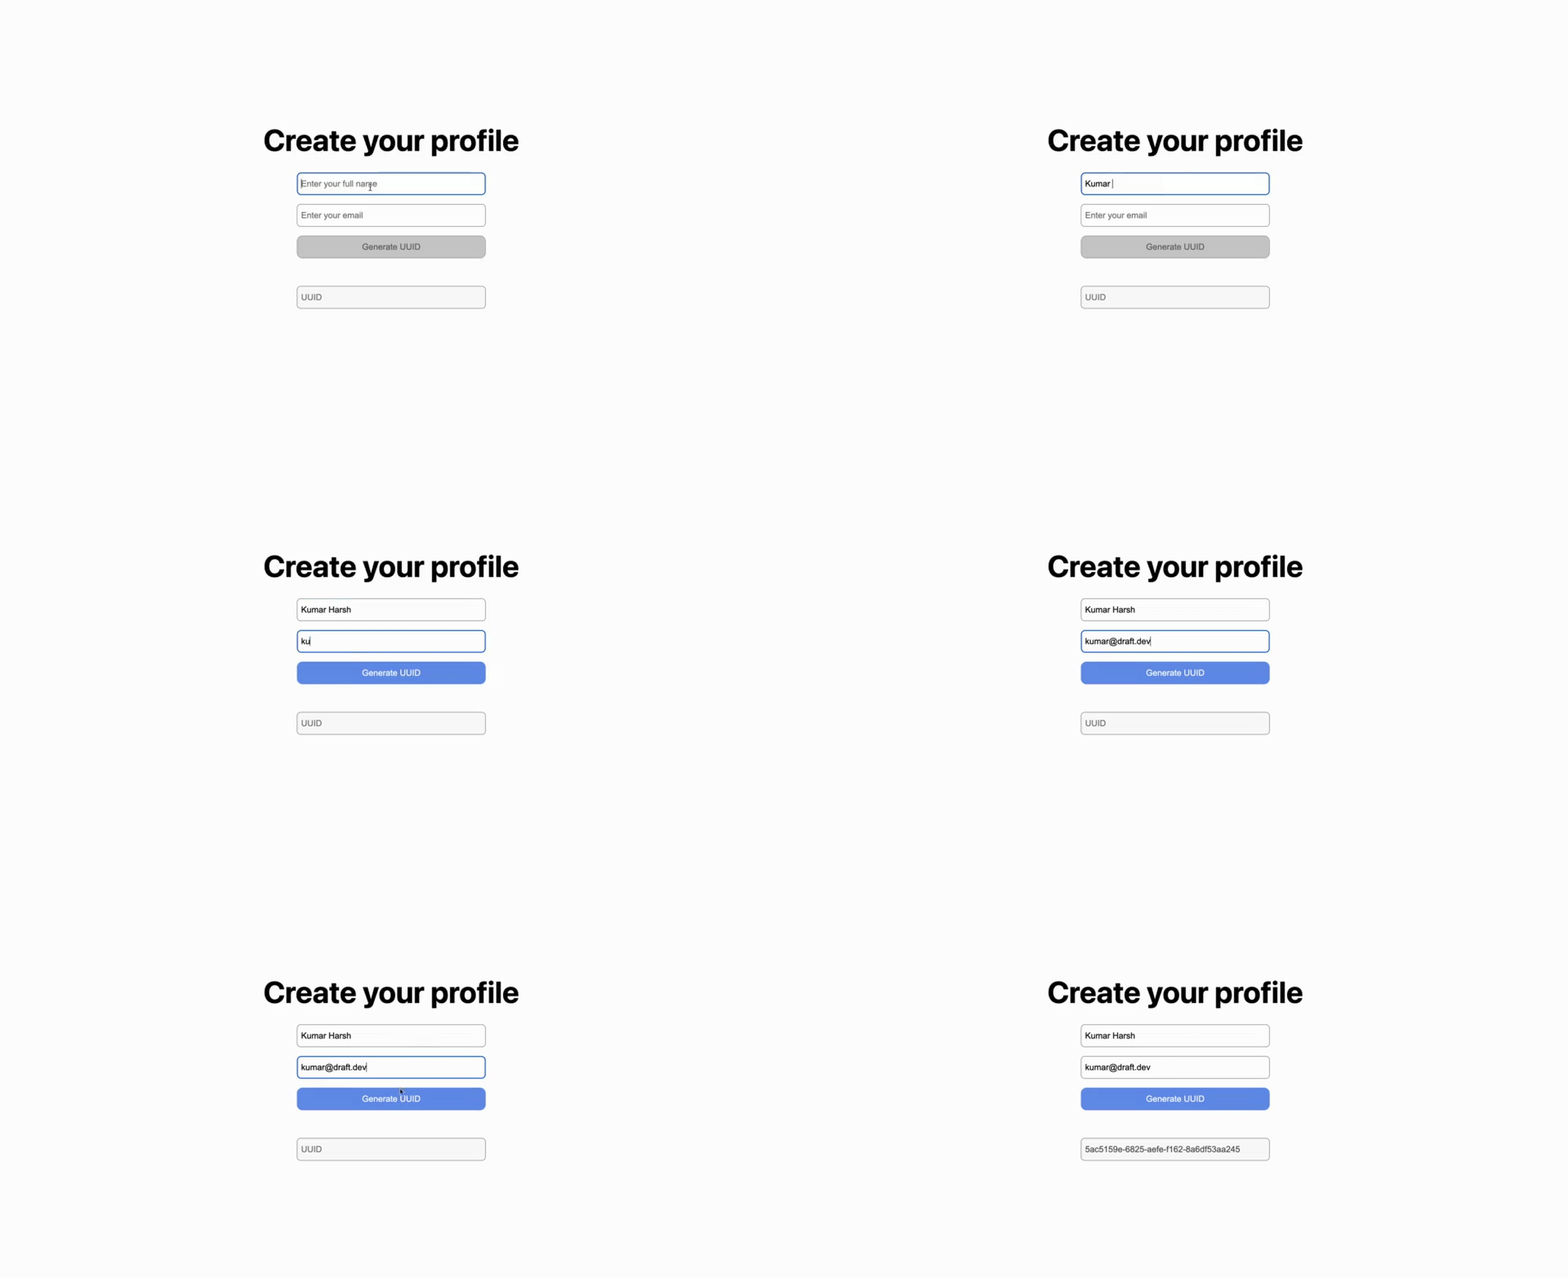
Once you've done this, you can see it in action by going to http://localhost:3000 and filling out the form.
Using react-uuid
Another popular method for React apps to implement UUID is by using the npm package react-uuid. Both the react-uuid and uuidv4 packages can be implemented seamlessly in React; their main difference is that react-uuid was designed specifically for React apps while uuidv4 was primarily meant for Node.js apps.
You can install the package in your project by running the following command:
npm i react-uuid
Next, you'll need to import the package in your source code by adding the following import line at the top of your App.js file (below the existing imports):
import uuid from 'react-uuid'
You can now use the following function to generate UUIDs using this package:
const uuidFromReactUUID = () => {const newUuid = uuid()setId(newUuid)}
Note: You'll need to paste this function in your App component.
To call this function when Generate UUID is clicked, you'll need to update the code for the onGenerateButtonClick function with the following:
const onGenerateButtonClick = () => {uuidFromReactUUID()}
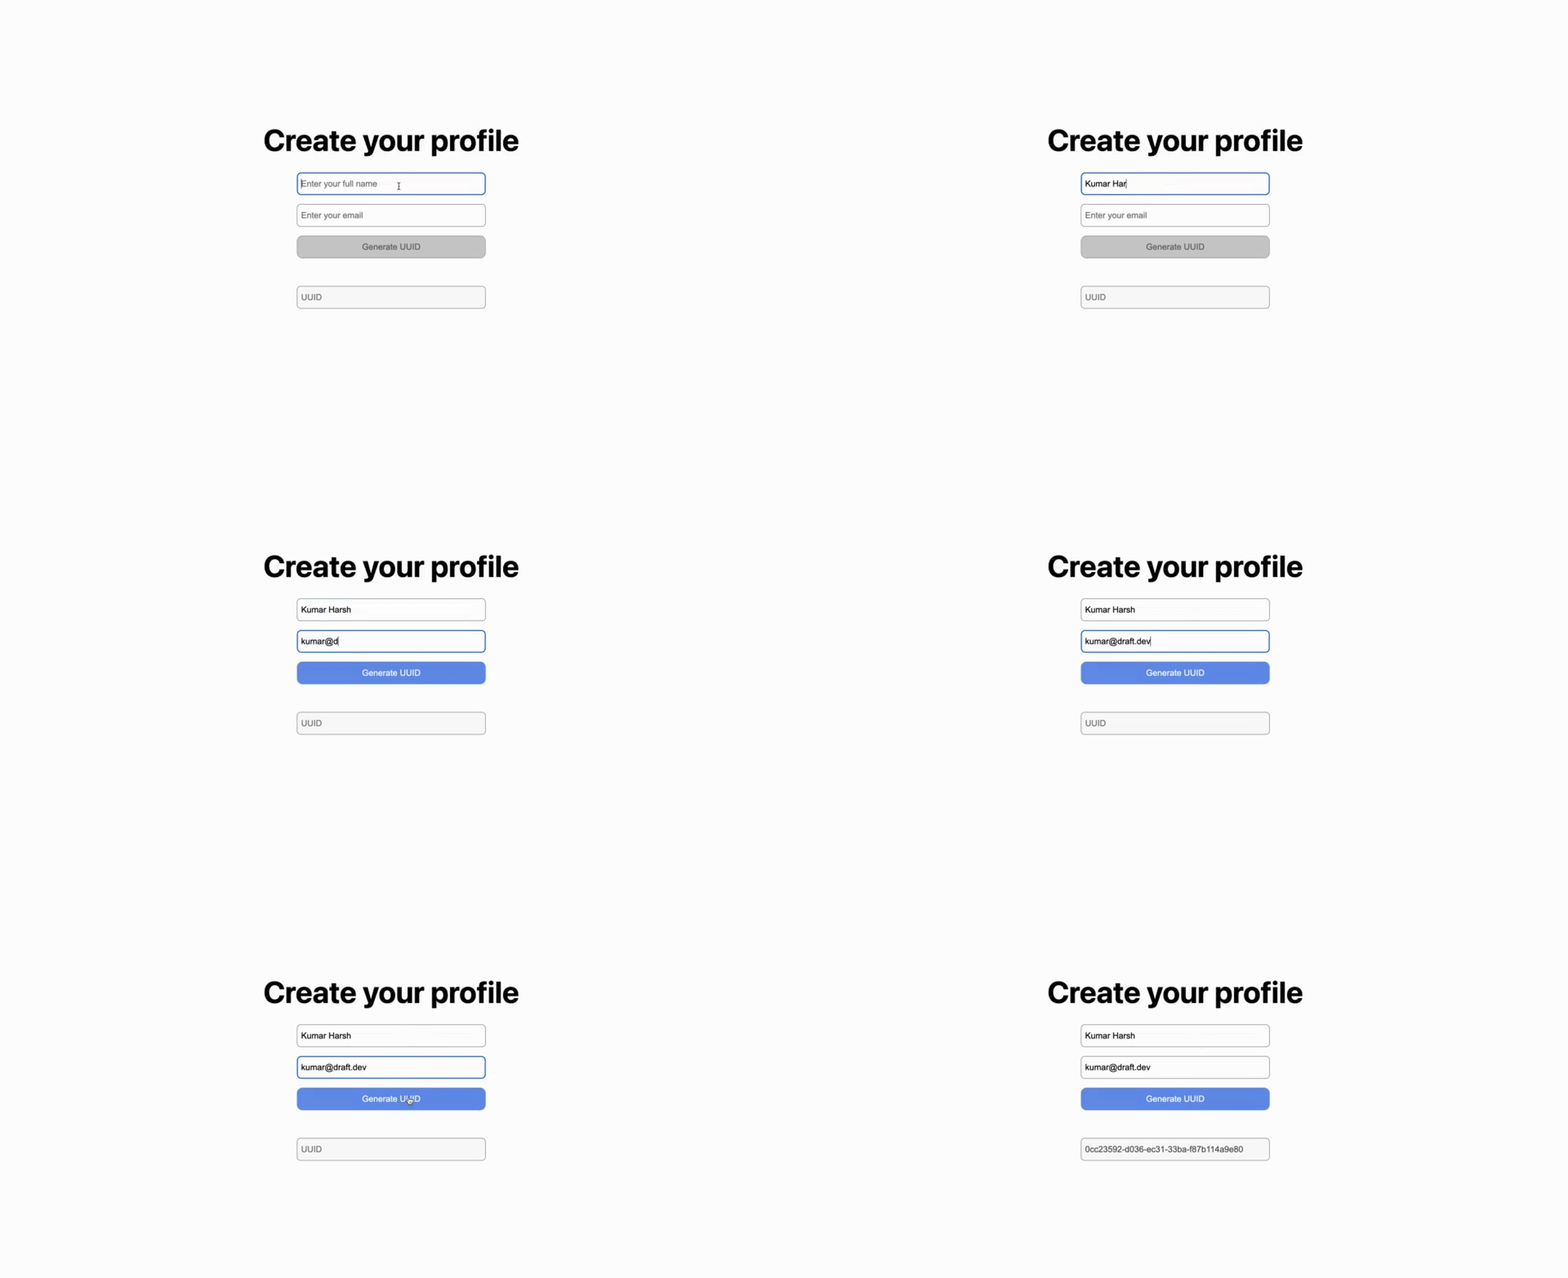
Once you're done with the steps above, you can see this function in action.
Using crypto.randomUUID()
The inbuilt crypto package in JavaScript runtimes can be used to generate UUIDs. Here's a function that uses crypto.randomUUID() to generate a UUID:
const uuidFromCrypto = () => {const newUuid = crypto.randomUUID()setId(newUuid)}
You don't need to include any imports for this to work. However, this method only works over secure contexts (local or HTTPSonGenerateButtonClick function to use this method in your app:
const onGenerateButtonClick = () => {uuidFromCrypto()}
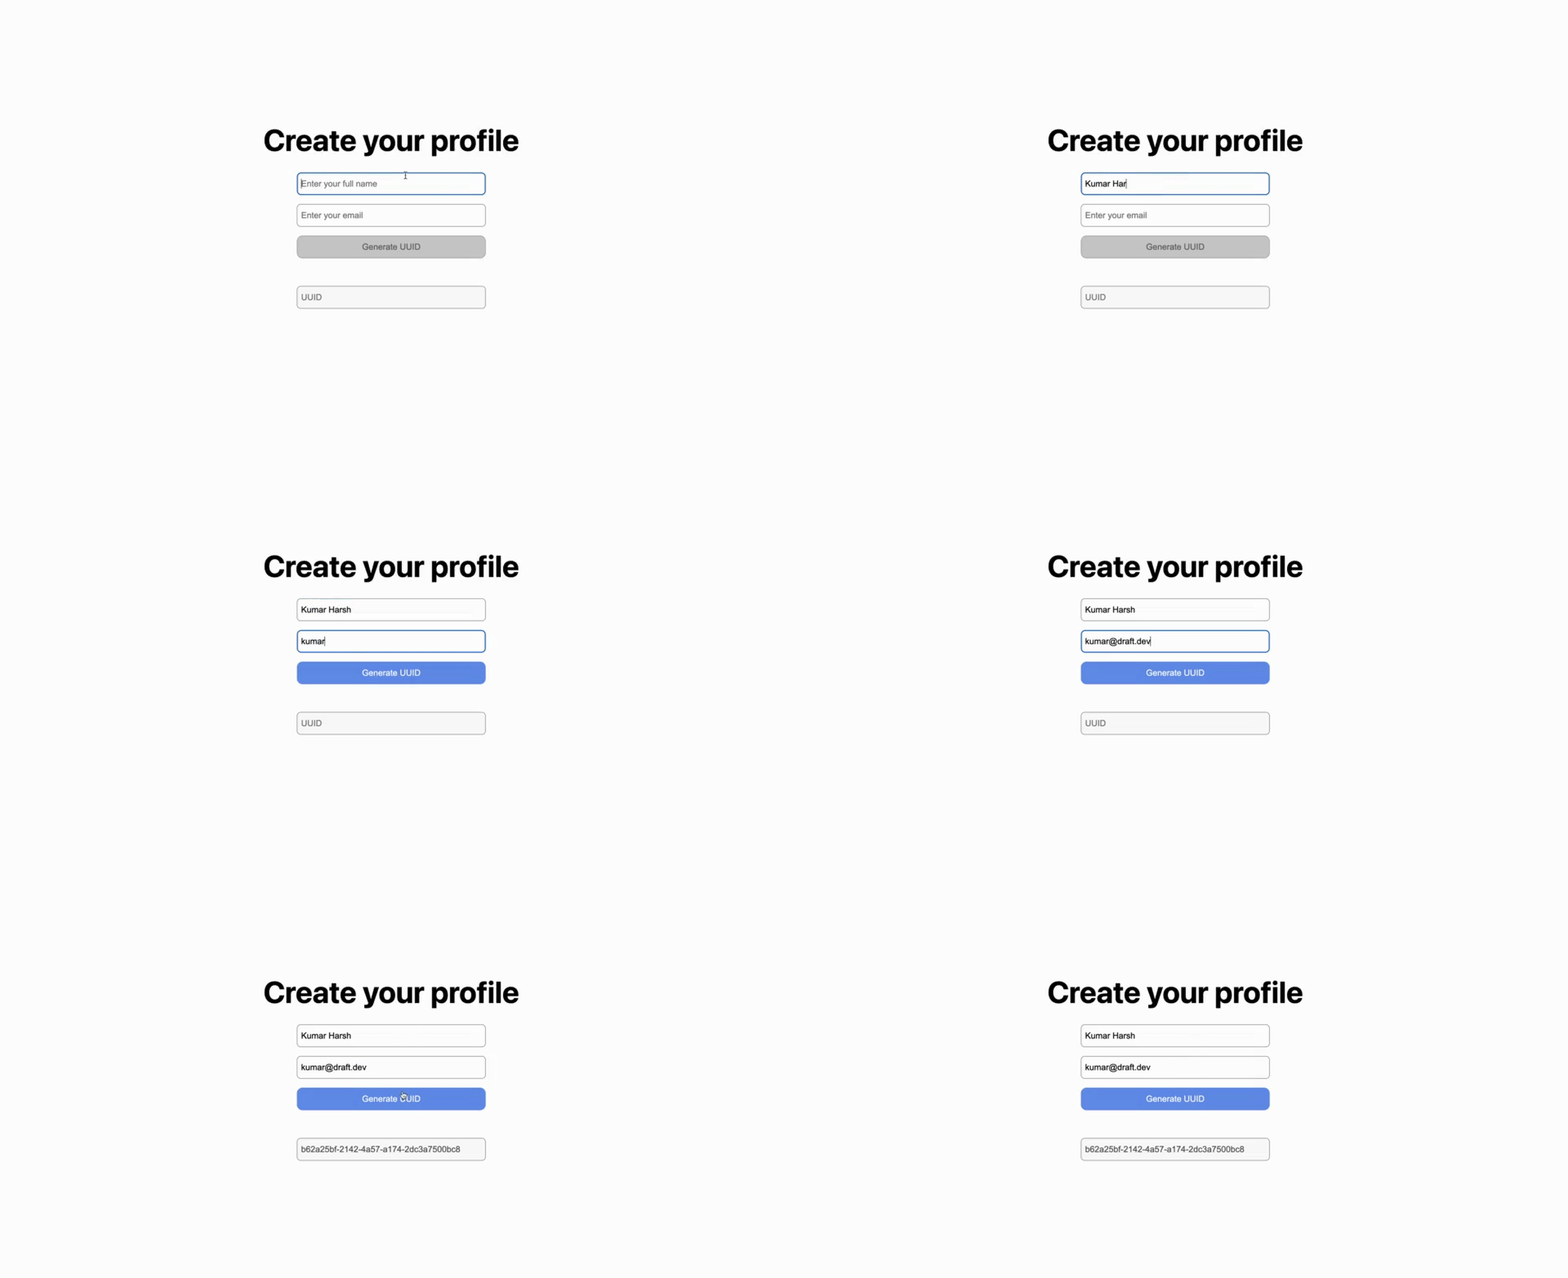
The result is similar to the other methods seen so far.
Through Code
Perhaps you prefer not to install any third-party libraries to implement UUID and the crypto.randomUUID() doesn't suit your use case. If so, you can use a method that relies on another function from the crypto package to generate RFC 4122–compliant UUIDs in your source code:
const uuidFromCode = () => {const newUuid = ([1e7]+-1e3+-4e3+-8e3+-1e11).replace(/[018]/g, c =>(c ^ crypto.getRandomValues(new Uint8Array(1))[0] & 15 >> c / 4).toString(16));setId(newUuid)}
Based on a Stack Overflow answer, this method fits most UUID-related use cases perfectly. Since it uses crypto.getRandomValues() instead of Math.random(), you can rest assured that the UUIDs generated using this method will be practically globally unique.
Here's how your onGenerateButtonClick function should look like using this method:
const onGenerateButtonClick = () => {uuidFromCode()}
The result will again look similar to the methods discussed above. Once you've filled in the form, you can keep clicking Generate UUID in order to generate new UUIDs.
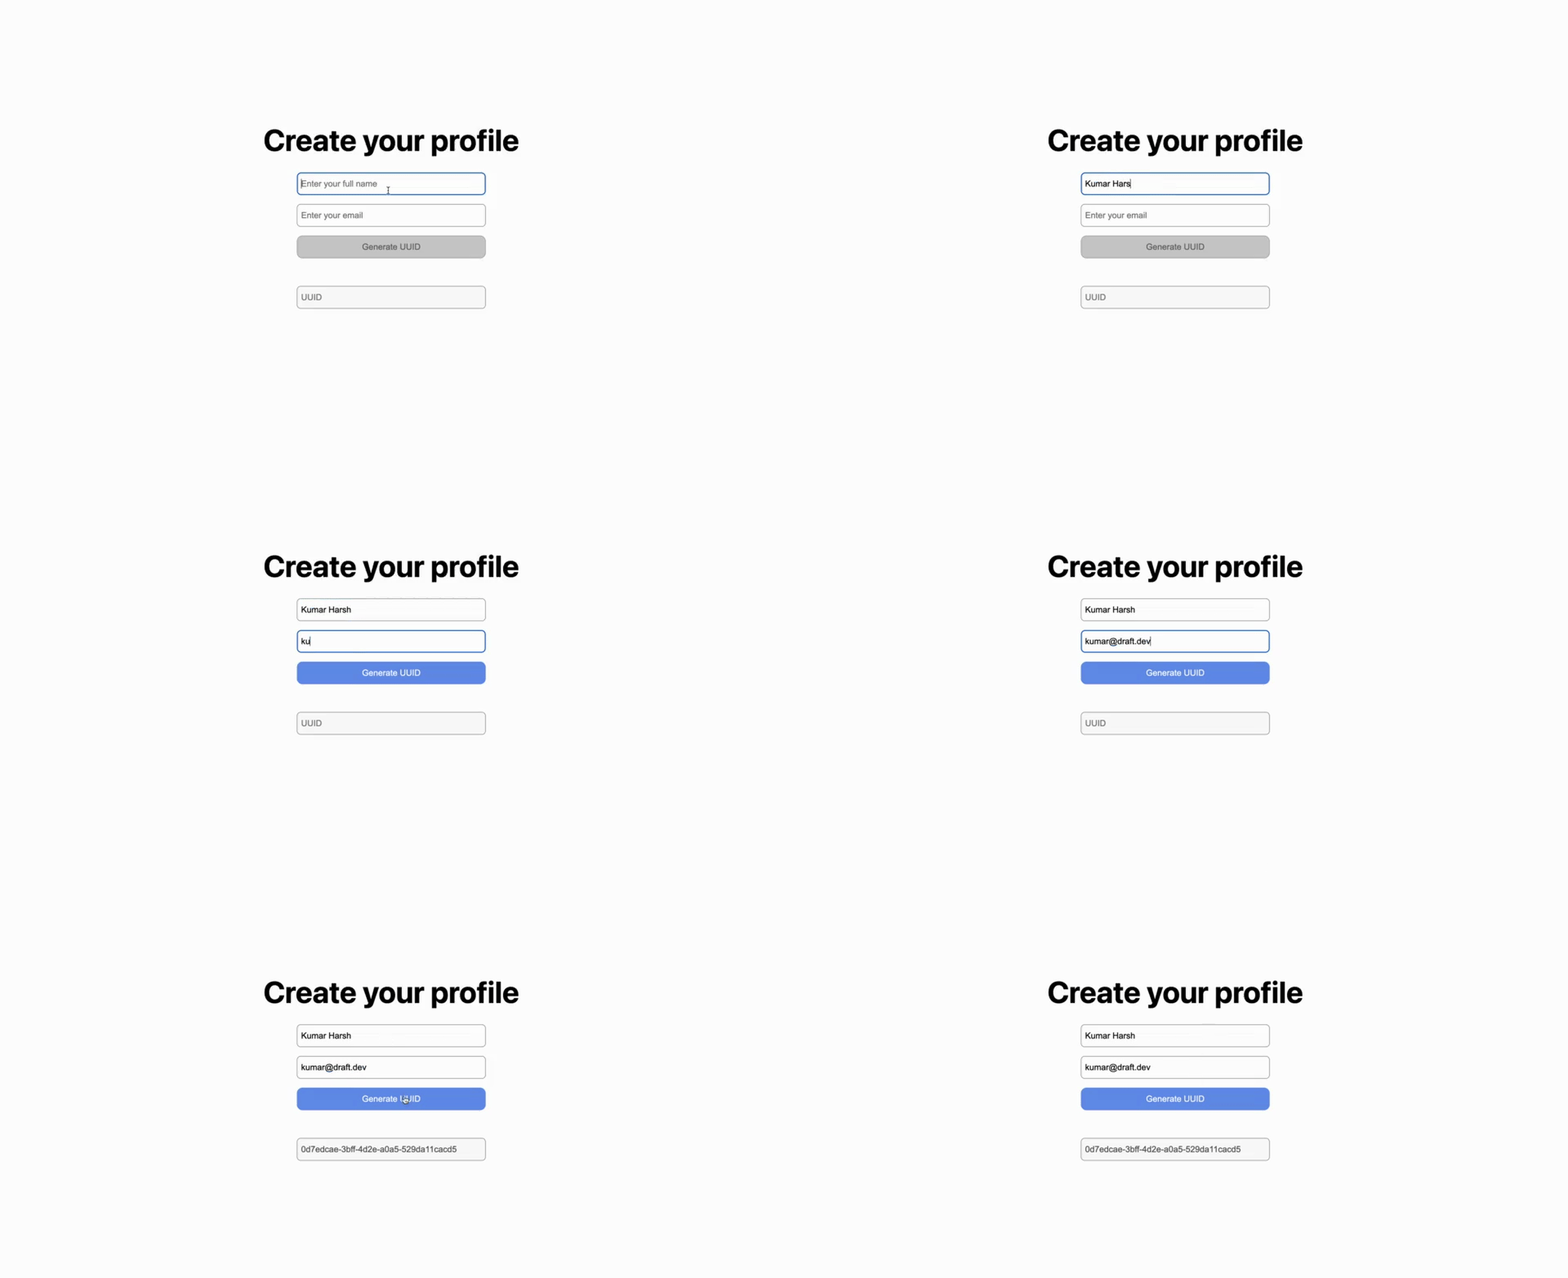
As mentioned, you can find the complete source code of the demo app used in the tutorial here.
Conclusion
UUIDs are handy when it comes to identifying records uniquely across tables globally. With an infinitesimal chance of collision, UUIDs present you with a robust solution to the global identification problem. In this article, you saw four different methods of implementing a UUID in your React app.
UUIDs are used in many third-party tools internally too. It's essential that the third-party dependencies you include in your app create UUIDs reliably to ensure the proper functioning of your app.
Clerk is an auth provider that makes it easy to add authentication and user management to your application. As for its data, Clerk uses K-Sortable Globally Unique IDs, or KSUIDs, for generating unique identifiers. These extend UUIDs to add time-based ordering and friendlier representation formats for simplicity. If you're looking for an auth solution for your app, make sure to check out Clerk!
Start now,
no strings attached
Start completely free for up to 10,000 monthly active users and up to 100 monthly active orgs. No credit card required.
Pricing built forbusinesses of all sizes.
Learn more about our transparent per-user costs to estimate how much your company could save by implementing Clerk.
Newsletter!
The latest news and updates from Clerk, sent to your inbox.